Tuesday 29 December 2015

how to create a gold geometric feature wall in 20 minutes...and it's removable!


Hi guys, I hope you all had a happy Christmas, I certainly did! I kinda feel like I neglected my "blogger duties" by not posting more about my decorations etc but I really just couldn't manage it. There was hot chocolate to drink, walks to take, baking to be done!

And a whooooole lot of whining and complaining about said activities to listen to. Expectations don't often tally with reality when it involves small children ;P

So sorry (not sorry) ;) I promise to do better next year, I swear it on my hot glue gun (which is about as close to a bible as you're going to get around here)

Wednesday 16 December 2015

Christmas tress for the space/cheer challenged


Mother o' gawd the weeks are flying by! I know it's been quiet around here of late but between taking a much needed little holiday away and getting my Christmas on with the mini monsters there just hasn't been a lot of time for photo editing and post-writing!

The natural habitat of the toddler is not tidy, and therefore not photo ready

Monday 7 December 2015

DIY Christmas mini marquee sign


Lighting is amazing. It can totally transform a space in seconds, and getting your lighting right is , in my opinion, the most important thing you can for your home.

That said, I am a sucker for a good lighting DIY, so when the lovely people at wayfair.co.uk approached me to see if I would like to create a Christmas craft tutorial for them (and I was like "hell yes!") it took about 0.00003 of a second for me to decide that this was what I would do. 

I've made one of these before and I love it so much that I really wanted a Christmas-specific one, plus I didn't do a proper tutorial first time round so this gave me the opportunity to remedy that.

The tutorial is live over on the wayfair site now, so if you want to find out to make this really cheap, easy and effective little sign then click the link and head on over ;)

http://www.wayfair.co.uk/Inspiration/Festive-DIY-Marquee-Sign-E10112


Disclaimer: I was given some items from the wayfair website free of charge in return for providing this tutorial but all opinions are, as always, totally my own. I only work with companies I really love and I think you will love too! Thank you for supporting the companies that support Make Do and DIY.

Friday 27 November 2015

easy DIY modern Christmas art


It's been a while, but I'm back from swanning around Edinburgh on my first trip out of the country since before Em was born with a quick and easy little craft that's great for doing with kids and will jazz up a Christmas mantelpiece. I like mine so much I'll be keeping them up year-round!

You know what's great about foreign holidays with small children? Nothing. So I left them at home.

Wednesday 11 November 2015

"This is why we can't have nice things", or, how to have small, fluid filled children and a beautiful home AT THE SAME TIME!!!


Wayfair gifted me this rug but all opinions are !00% my own. I wouldn't mention it if I didn't love it!


We have a lot of "accidents" around here. A "mostly potty trained but not always" little girl and a "thinks it's funny to fling food" little boy live here and they keep me pretty busy just running around after them making sure the place is just about clean enough so that they don't catch some hideous disease. 

Despite this, I am not willing to give up on having a beautiful home that reflects my taste. I just need to be a bit creative when it comes to the items that take a lot of abuse around here, and I thought you might be interested in hearing about what I found ;) 

So in no particular order, here are some of my life (and sanity!) savers:

Friday 6 November 2015

turning a run of the mill fireplace into a feature

First things first, the response to my post about giving up work last week got an absolutely amazing response! It was really great to have a rant and here from a lot of people who have been struggling with pretty much the same issues....even if it was weird and uncomfortable for me to share it. Thanks guys! 

*gives awkward pat on shoulder*


So on to today's post! Remember a few years ago when everyone got into feature walls in a big way? It often manifested itself in a chimney breast that was either painted in a strong colour or covered with wallpaper in a striking pattern.

This is the how our chimney breast looked when we moved in...


Now, I like a feature wall as much as the next person, but this just wasn't working in here. It was a small, dark room, and the walls were painted this dark brown and a lighter colour that could be best likened to custard. I had a chocolate pudding sitting room....

Friday 30 October 2015

becoming gainfully unemployed (or how I'm giving up my job to stay at home wiping bums and getting punched in the crotch)


Today I gave up my job.

~pause for major anxious reaction


O.k. It's o.k.....I think. What the hell do I do now?!! 


The same thing I've been doing every day for the past year I guess.


Saturday 24 October 2015

the ultimate "new kitchen counter" cheat!

diy super cheap, easy marble look counters done with contact paper. www.makedoanddiy.com

This post contains affiliate links

We've reached the end of the kitchen tutorials now, and I think I've saved one of the best till last. I say best, because this project genuinely surprised me with how easy and effective it was!

I had debated for a long time  over what I was going to do with the counters. What I originally wanted was solid wood butcher block, like we have on the island, and we probably could have afforded it at the time if we installed it ourselves, but the problem was that I hadn't settled on what my idea of the ideal kitchen was. We knew that we would be changing things down the line when we had the money, so it seemed foolish to rip out the old counters to install the ones we wanted now, when we would probably have to rip it all out again next year when we were doing the full renovation.

** update!!! If you'd like to see how my counters are holding up 18 months later you can find that post here

Tuesday 20 October 2015

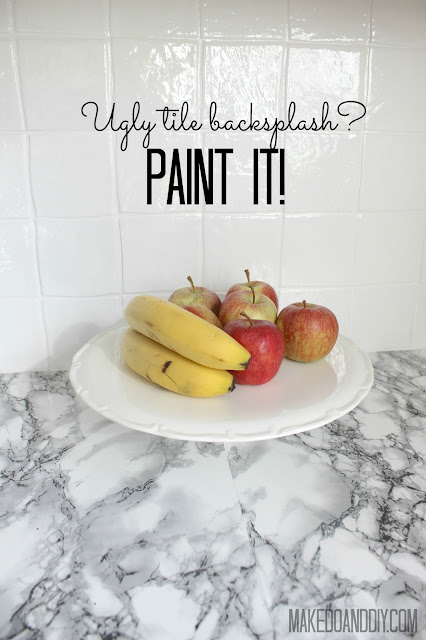
painted tile backsplash-cover those ugly tiles!

painted kitchen tile backsplash, cheap and easy update for dated tile. www.makedoanddiy.com
This post contains affiliate links


So here we are, another week, another kitchen post, but there's just one more after this and then I'm done, promise! I'm ready to be done with this series, and in future I think I'll post tutorials as they happen and then recap with a full reveal whenever I get it together enough to do that. I feel like I have to finish all these kitchen posts before I move on and it's kinda stifling my creativity ya know? *gag!

Thursday 8 October 2015

gold toe-kicks (for realz)


Kitchen toe kicks updated with gold duck tape! Totally non-permanent and reversible, perfect for renters.


Hopefully you guys aren't getting fed up with all this kitchen talk but I want to finish up giving all the info and answering questions on the different aspects of the makeover before I move on to something else. I'll get the posts about the counters and the cupboards up next week and then I'm done, promise ;)

So today, let me introduce you to something that is fast catching up with Rustoleum's bright metallic gold spray paint as my favourite way to update something, fast!


Monday 5 October 2015

pimp my dishwasher


I stuck gold foil tape on my dishwasher!.........

Wow, that really didn't take long enough to explain to warrant a full post :/

Oh well, on to the pretty pictures!!!!

Tuesday 29 September 2015

painted tile floor-no really!


how to paint a tile floor, and what you should think about before you do!


First off, can I just say a HUGE thank you for all the positive feedback for the kitchen reveal? It was so great to hear how much you all liked it. I mean, I knew I liked it but to hear all of your kind comments really drove home to me how right I was to go with my gut and just jump into that makeover....even though people looked at me like I was crazy when I told them what I was doing!


So today I'm going to go through the process of painting our kitchen floor....and the pros and cons of taking on a project like this.

Wednesday 23 September 2015

€200. One week. Full kitchen makeover!


This post contains affiliate links

Yes, you read that right. We re-did our entire kitchen for under €200. Floor, cabinets, counters, hardware, the lot! And we did it in one week* without losing our minds or ruining our marriage. 

Wednesday 9 September 2015

shameless touting for votes!!!!


By some miracle I have been shortlisted for the Blog Awards Ireland! 

To say I'm delighted is a serious understatement, this little bog has only been going for a couple of months and get this kind of a pat on the back is hugely uplifting. 

Sometimes it can be really tough when you compare yourself to other blogs that seem to be doing so fantastically. It can often feel like no-one but my family are actually reading my posts, so I'm taking this a sign that I'm doing something right. And I'll try and remember that the next time I'm lamenting the fact that no-one is commenting :)

This round of judging is 30% down to a public vote, so if you have enjoyed reading about any of my little adventures in home improvement (or if you just like being forced to look at photos of other people's children and that's why you keep coming back) I would be ever so grateful if you could take a moment to click the link and vote for me. 


https://www.surveymonkey.com/r/PZ88979


It's quick and painless, I promise!

p.s: you can vote from anywhere in the world ;)


post signature

Thursday 3 September 2015

I've been shortlisted!!


I've been shortlisted for the Blog Awards Ireland and I am freakin' ecstatic about it! I haven't been doing this for very long and I'm still finding my feet so something like this is a real boost for me :) 

Even if the I don't win I'm really proud that my little blog has gotten this far....and I'm definitely taking the chance to head to the awards and have myself a night out!!

Thanks so much to whoever nominated me, and I'll be looking for your help with the public vote soon so get ready, I will of course be offering bribes for votes ;)


                                                Linda xx

you know how you can pretty much paint anything?......


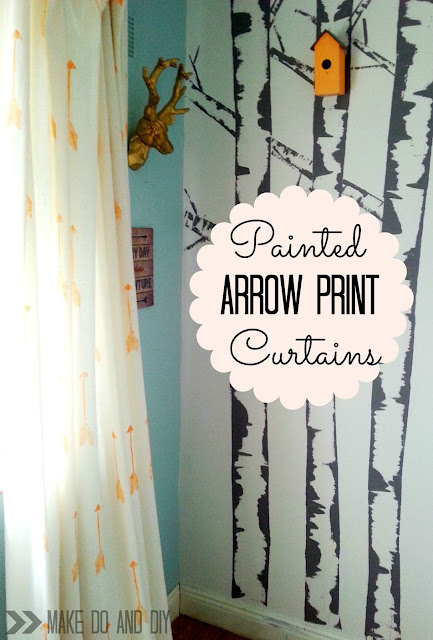
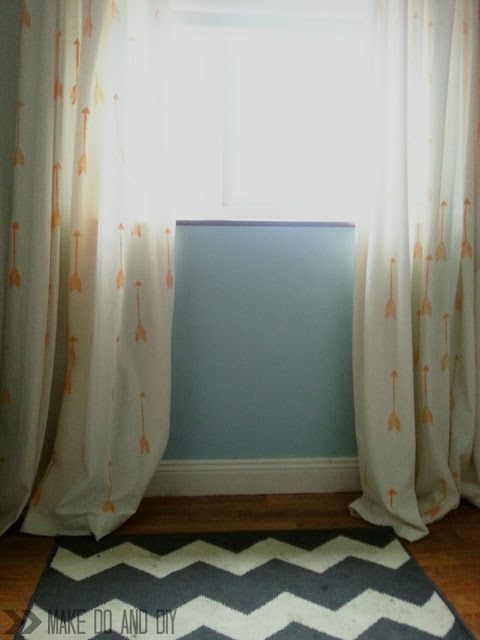
diy paint stamped arrow curtains


Finally, finally I am getting around to talking about the curtains for Max's room. It was a really easy and effective diy that I've been meaning to share for a long time, and the main hold up is basically that I'm a really crap amateur photographer and I couldn't get a decent picture of them. So I finally figured I'm not going to be buying a decent camera or taking a photography course anytime soon so I may as well make the best of what i have and just get on with it! So here we go....


diy paint stamped arrow curtains


*disclaimer ~ not only am I a crap photographer with bad tools but these photo's were taken pre-blog, in that scary time when I didn't know you shouldn't take photos at night!


I knew I wanted curtains with some sort of a print that would tie in with a woodland/camping theme, and after months of browsing fabric online and checking ever shop I came across that looked like it might have something suitable I accepted that I wasn't going to find anything that would cost less than €100 for the amount I would need....and that just wasn't happening! 

~ my entire spend on Max's room came to €101 in the end, so you can see how much expensive fabric just wasn't a possibility for me!


Honestly the patterns I was finding weren't really what i wanted anyway, so faced with the problem of coming up with modern, patterned, full length curtains to tie in with Max's room and with no possibilities (and no money even if there had been!) I did what I always do....I went to pinterest! I typed in "diy curtains" and lo and behold there were a million tutorials for painted curtains.

~ I did this project before I did the painted rug for Em's room - this was project 0!

I already had a few pairs of cheap curtains I had gotten last year in Guiney's (they were €5.99 a pair but they were Laura Ashley so I presume they're seconds, there isn't anything wrong with them that I can see so I snapped up four pairs to add to my hoard!) so all I needed was a pattern....and a way of applying it.

I settled on arrows as my image. I've seen them all over recently and I really love them. I originally thought I would cut a stencil and paint over it to create the pattern, but then I realised that seeing as my image was so simple it would be easy to make a stamp...and that would be waaaayyyyy quicker when it came to painting, and more accurate too, win/win!

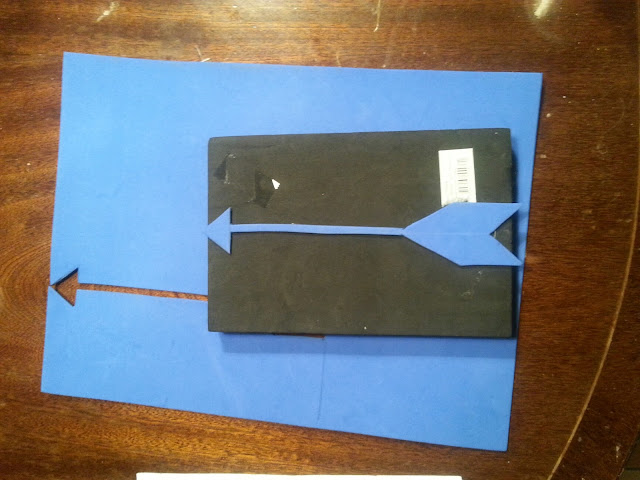
With this as my plan I picked up a piece of foam from a craft shop, cut my arrow shape out of it and stuck it to another thicker piece of foam (you could use thick cardboard for this too)


diy paint stamped arrow curtains


I had a tester pot of paint in my chosen colour all ready to go.

~I've mentioned it before, but Valspar testers are really generous, there's more than enough for most small projects. I used less than half a pot for the curtains, and I've painted my whole fireplace with one in the past-two coats!


diy paint stamped arrow curtains


I added fabric medium to the paint to make sure I could wash them.


diy paint stamped arrow curtains


Then I tested out my stamp...


diy paint stamped arrow curtains


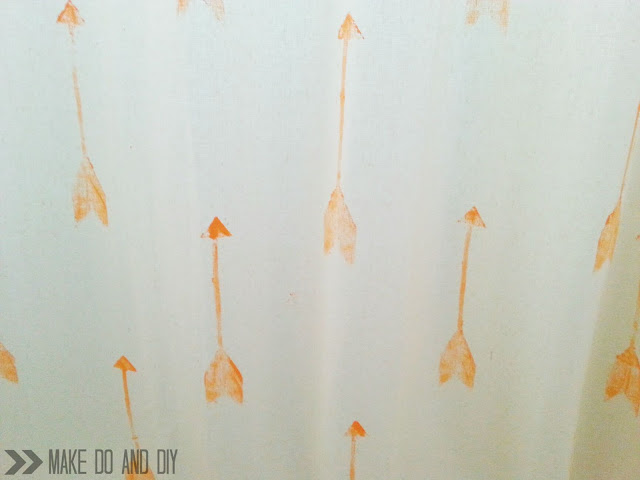
And off I went! I applied the paint to the stamp with a brush to make sure I didn't get too much on it. It took about two hours to do the whole thing, and then I let them dry overnight before ironing them (to set the fabric medium) and hanging them up.


diy paint stamped arrow curtains


diy paint stamped arrow curtains


                  diy paint stamped arrow curtains


I must say I love them. They're exactly what i wanted and they cost me less than €10 all told!

What do you think? Would you ever paint a pair of curtains?


                                                 Linda xx


                         diy paint stamped arrow curtains


Friday 28 August 2015

I've been longlisted for the Irish blog awards!

         
Longlisted-Buttons-300x2505


       Whoever nominated me, thanks a million! You guys are brilliant! :) 


                                               Linda xx

Thursday 27 August 2015

Max's room reveal! Finally!


I did it! I finally finished a frickin' room! In it's entirety!!!

*pauses to wait for applause*

Thank you, thank you, yes, I'm very proud of myself ;P

Monday 24 August 2015

adding some colour to the garden (when you can't grow flowers!)


painting birdhouses to brighten up the garden


This summer has been a total bust. 

To give you a visual of how much of a bust it has been...as I write this there is rain pounding down so hard outside that it is actually crushing the couple of flowers I did manage to grow, grrr!!! Bloody Irish weather! 

I had visions of spending our first summer in this house sitting out in the garden, surrounded by flowers, having barbecues, you know, generally enjoying finally having some outside space after living in a seventh floor apartment for six years! But alas, it wasn't to be.

So I wasn't going to get my colourful, sunny garden (this year at least), but I still wanted to jazz up the area and add a bit of colour any way I could. I spend a lot of time looking out at that garden so I want it to be cheerful! 

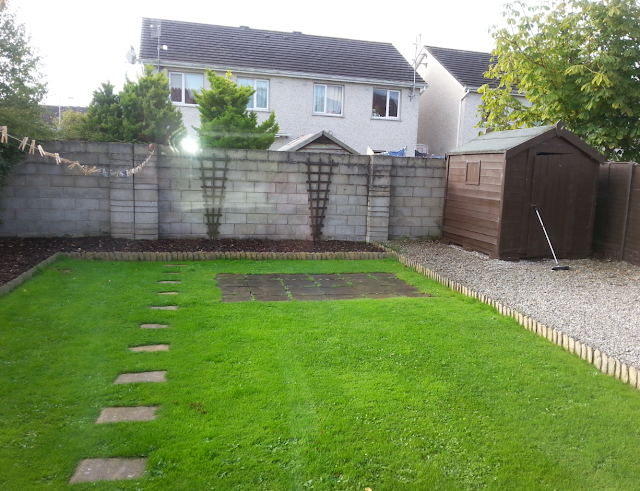
This is what we had to work with....


painting birdhouses to brighten up the garden


So, when I saw some little bird houses in Dealz for €1.49 each I bought a bunch of them (I used two in Max's room) and painted them seriously bright colours that I got testers of from Valspar (in B&Q) when they were having a promotion and selling the testers for €1.60 each, bargain!


                   painting birdhouses to brighten up the garden


painting birdhouses to brighten up the garden


                 painting birdhouses to brighten up the garden


These little pops of colour, along with painting the wall and the shed, really brightened up the place.


painting birdhouses to brighten up the garden


                     painting birdhouses to brighten up the garden


So until next year, when I have another chance at getting my fantasy garden up and going, these little beauties will brighten up the place and give us something pretty to look at when we're standing at the kitchen sink ;)


                          painting birdhouses to brighten up the garden


So that's my little solution to the "Irish summer blues". Things have been a bit crazy here for the last week, big things are afoot in the kitchen! I hope to have a post on that asap, but in the meantime come and follow me on Facebook or Instagram, where I put up "in-progress" photos :)


P.S: Anyone else sick to the back teeth of this weather? 

*sigh*
                                                 
 Linda xx

Thursday 13 August 2015

creating (or curating) a great* gallery wall


*if I do say so myself

planning out a gallery wall of photos and mementos


So it would seem that this week is gallery wall week here at make do and diy! I don't plan my posts, things just happen when they happen and then when I can muster the energy I blog about them, so it looks like I've been in picture hanging mode here recently seeing as I finished two last week!


There was a big blank space on the wall over our ikea hack dresser in the bedroom that was crying out for something to dress it up (I didn't take a picture, this was a late-night, impulse project). I had considered a large piece of art, and had bought one that I loved (this one) but when I hung it there it just didn't do it for me. So, back to the drawing board, and I decided on a gallery wall (based mostly on the fact that I have a LOT of frames hanging around this house).

I had collected a lot of pictures and items that related to our wedding and the kids that I had planned to build up until I had enough to fill a really tall blank wall at the top of the stairs, but what I had was perfect to fill the space in the bedroom so I decided to put it there for now instead. 


           planning out a gallery wall of photos and mementos


In all honesty we will probably have to give in and put wardrobes in this area eventually anyway (I had been holding off because I thought it would make the room look much smaller) so the stairs gallery wall will probably still happen some day! 
I'm just learning that I need to work with what I have right now, not with some potential future layout in mind, because who knows when that will happen? And I'd rather have a house that's decorated to make me happy as it is for the time being. Holes in walls are easy to patch!!

So I gathered up what I wanted to use on the wall and played around with the layout on the bed until I had something I was happy with, and then Gavin and I spent half an hour holding things up (him) and standing back to make sure it looked right (me) before using a combination of nails, command strips and blu-tac to put everything up. I started with the large gilt frame with our initials in it and then worked out from there, balancing the larger and smaller pieces, as well as the gold and black, making sure they were all quite evenly distributed.

Does that make sense? It's hard to describe something like this as it's really subjective. What looks good to me might look terrible to you!

*sidenote ~ I'm an eyeballer. Lifes too short to measure distances between frames!


And here's the finished product in all it's naked-baby celebrating glory! 


planning out a gallery wall of photos and mementos


I love it, it's nice to see all those reminders of when I was skinny and the reasons I am currently...less skinny ;)

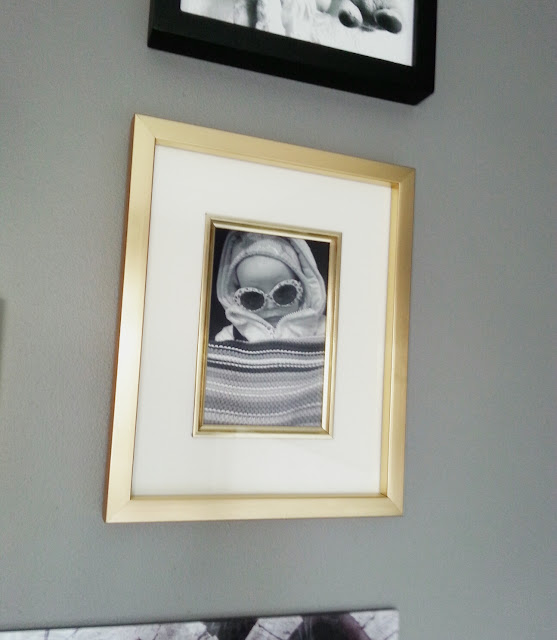
The gilt frames are from charity shops. You can nearly always pick some of these up really cheaply if you look at the frame, not what's contained in it - bad art can be removed! The large one was €5, the smaller one was €1. 

The canvas of naked Emilia was a beautiful gift from friends of ours (who also took the photos), and the pics from our wedding were taken by them as well-I recommend having a talented photographer for a friend ;)


planning out a gallery wall of photos and mementos


That little painting is Emilia's first ever commissioned artwork-I gave her the colors I wanted and let her go to town!


planning out a gallery wall of photos and mementos


This is the topper from our wedding cake....


planning out a gallery wall of photos and mementos


Naked Max-not to be outdone by Emilia.


planning out a gallery wall of photos and mementos


I didn't have a suitable mat for this one so I just stuck the photo directly onto the glass with double sided tap and I love it, makes the old-fashioned gilt frame look modern. 

Also, mustaches on babies - always hilarious.


       planning out a gallery wall of photos and mementos


I picked these frames up for €4 each on sale in Heatons. I buy frames cos I like them and they're cheap, I rarely buy them with a specific place or photo in mind. When I need one I just go to my "collection"! I generally stick to gold/white/black/wood so they fit in anywhere in the house.


planning out a gallery wall of photos and mementos
I'm afraid she may have inherited a chronic case of RBF from me.


I kept the colour scheme to black and white images and black and gold frames, which ties the whole thing together. I think it's important to pick some sort of a theme and carry it through to tie your display together and make it look like a cohesive piece rather than a random collection of things....my theme for this was obviously "look at my awesome family!", which is why I kept it in our room so as not to be too obnoxious about it ;)


planning out a gallery wall of photos and mementos
I picked up the mirror on sale in Heatons for €4. It was originally silver, but that never puts me off, spray paint is cheap!


I left a gap at either side cos I have a bit of a crazy idea for a diy for two lights to go go there, something like this gold one....


76 Industrial Decor Ideas - From Industrial Hanging Pendants to Wooden Concrete Lighting (TOPLIST)
Trendhunter


But if that doesn't pan out I'll extend the gallery right up to the wall on either side I think. Thoughts?


planning out a gallery wall of photos and mementos
Yes, that's a mirror ball and a reindeer plant pot, I don't discriminate when it comes to decorative items!


I genuinely, 100% love hearing from you all in the comments...talk to me!! :D


Linda xx


If you liked this post, you may also like:

washi tape frames

kids room gallery wall

simple ikea rast hack


Wednesday 5 August 2015

washi tape frames


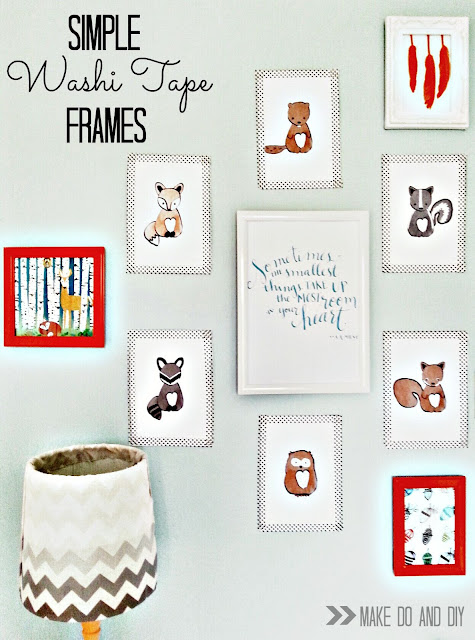
washi tape frame woodland nursery gallery wall


This is hardly a wildly innovative idea or anything, but I had a problem and I solved it with this neat little idea that cost very little and took about five minutes, so I thought it was worth sharing!


washi tape frame woodland nursery gallery wall
Winnie the pooh quote free printable


The problem was the gallery wall I had put up in Max's room. 

I always planned on having some sort of gallery in there and had gathered a couple of things, like the cards from Tiger (2 for €1) and the feathers, but when I had my mad burst of energy and got the feature wall done and the other decor up I was on a roll and decided I wanted the whole thing finished! (there are no "finished rooms in this house, I got impatient!)

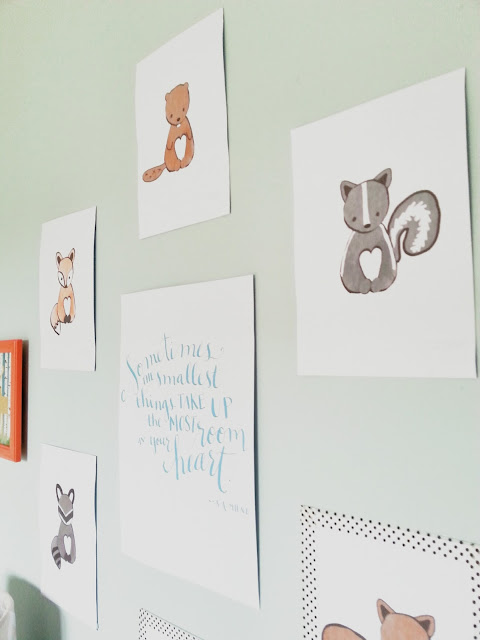
So I took myself on over to pinterest to find some free printable's to bulk it out and found this lovely set of baby woodland animals  from "We lived happily ever after" (amazing blog, loads of great ideas and free printable's). 

I printed them off on white card and set about arranging my wall, just sticking the paper up with blu-tac and then adding a couple of frames I'd gathered with the intention of using them in here at some point. This setup was fine for a while, and I was going to leave it like that, but the edges of the pictures were wonky cos I just cut them willy-nilly with a scissors, and they didn't stand out as much as I'd like, especially next to the framed pictures.

So I looked around for some cheap frames, but couldn't find anything I liked in the right size, and to be honest I didn't really want to buy six small frames just because something that was really fine wasn't exactly how I wanted it. I already have a large frame collection, and whereas bigger, chunkier frames would always be re-used, smaller ones aren't so versatile.


And then, when I was browsing in Tiger I came across their packs of washi tape and realised that was the answer! Washi tape is cheap, comes in loads of colours and patterns, and wouldn't damage the walls. I'd just outline the art in patterned tape! 


washi tape frame woodland nursery gallery wall


So here's the finished product....


washi tape frame woodland nursery gallery wall
Oh, to be able to afford a proper camera!


washi tape frame woodland nursery gallery wall


It makes the pictures stand out and improves the whole display. Also, these pictures didn't need nails in the wall or expensive command strips cos they're just pieces of paper, win!


washi tape frame woodland nursery gallery wall


Washi tape comes in all colours and patterns, and it has about a million uses. I love it, I'm amassing quite a collection! I've bought some online when I wanted something specific, but stationary/craft shops usually have a decent selection, and it generally costs around €1/€2 per 10 meter roll. I can definitely see myself using it for more gallery-style displays, these inspiration pics are so simple and pretty.....


washi tape frames
Fox and Star


30+ Fun Washi Tape Ideas + Downtown Tape WASHI GIVEAWAY!
Design Sponge


What do you think? Washi tape ever come to the rescue for you?! I've seen some amazing ideas for using it, feature walls, furniture upcycling...you name it, washi tape can be used to jazz it up! In fact there's a wall in my living room I may need to introduce it to....


Lindaxx


01