Tuesday 5 December 2017

my favourite interior trends this season


FANCY! Design Blog | NZ Design Blog | Awesome Design, from NZ + The World
The New

As someone who's really into interiors I always love watching new trends emerging and seeing how people incorporate them into their homes. There are so many things I'd like to try myself, and while my own style is some kind of a scandi/mid-century/eclectic mash-up, there is only so much experimenting I can do before my home starts looking like I have multiple personalities! 

Monday 30 October 2017

plans for a nautical, cool kids bathroom


This is a sponsored post. As always, all opinions are my own. I only work with brands I love and I think you'll love too ;)

I know, I know, I barely managed to finish my own bathroom, why am I planning another one? Well folks, this is why....


Yep, that's a light up mermaid sign friends, and it was on sale, so I literally couldn't not buy her. The minute I saw her (in The Range for €15 if you're wondering) I fell head over heels, and I knew I needed her for the kids bathroom. I hadn't had any plans to touch that room ANY time soon but sometimes inspiration hits and you just have to go with it! 

This room is the main bathroom in the house but it's only used by the kids so I can have some fun in here. I want it to be child-friendly, but not childish. So fun, and whimsical, but no primary colours, no plastic, and absolutely, positively, no cartoon characters.

Starting with my beauteous mermaid I want to go with a kind of jules vern, steampunk-y nautical vibe in here, but with a palette of soft blue greens to stop it being too heavy or adult. Here's a basic moodboard to give you an idea of what I'm thinking....


The floor in here is actually the only one in the house that I didn't dislike when we first moved in so it will stay, but I will be refreshing the grout lines. It's a nice deep blue colour, so will work well with the theme.

The wall tiles in here are also fine, so I'll just be painting the walls a nice white, and adding a feature wall of some kind. I'm thinking an ombre scale pattern? The paint colours on the board are Farrow and Ball "All White", "Blue Ground" and "Vardo", and I'm thinking of making some scale shaped stamps and trying to recreate a fish scale pattern using those colours. 

I would be getting the paints mixed in Fleetwood paints though cos....money.

The shower in here only get used to rinse the kids off if one of them decides it's hilarious to pee in the bath to freak the other one out, so I'm going to replace the ugly curtain rail with a prettier, but less practical round curtain rail. The one in the picture is this one from Argos.

I'm hoping to use pallet wood to create a really cool, rustic bath panel which I think will fit in really well with the theme. I'm also going to use pallet wood for shelves, and possibly for some storage crates.

I say "I", like I'll actually have anything to do with that other than nag Gavin until it gets done.

I'll frame a round mirror with rope, and I've seen this great nautical compass wall decoration that I'll pick up. Add some vintage style art, an octopus toilet roll holder and a nautical style light like this one from Lights.ie and we're done!

What do you think? I think it'll be really pretty and fresh, and something that walks the line between what I want and what the kids want, cos I know they're my kids and I love them but they have terrible taste and this is my damn house.


Wednesday 25 October 2017

oops I did it again.....painted tile floor 2.0


how to stencil a tile floor with chalk paint to get the look of Moroccan tile


So you know how I've been saying since the dawn of time that the en-suite is practically finished and I just have to add the finishing touches and it'll be done? 

Well.....somehow last week I went in there to put up a frame and ended up stencilling the floor.

That's how it works around here, I'll put things off for months and then find myself elbow deep in paint at one in the morning, or ripping out manky carpet after just going upstairs to put some washing away. I've learned to just go with it. Gavin has learned to not ask questions. 

If you've been with me for a while you'll know that I painted my kitchen floor to make it less vomit-inducing while we saved up to have it ripped out and replaced. Well, the floor in here was less offensive, but just as dated. I had thought I would just leave it as is, hoping that it would kind of just fade into the background, but then as the rest of the decor in here came together I thought it would be a shame to have the floor sitting there, all beige and boring, ruining the look.

how to stencil a tile floor with chalk paint to get the look of Moroccan tile

So yeah, one day I came up here to put up a few pictures, realised I had a tin of paint, a stencil and two hours of actual free time until I had to pick Max up from playschool. It was a perfect DIY storm, and before I knew what was happening I had a coat of white paint on the floor. 

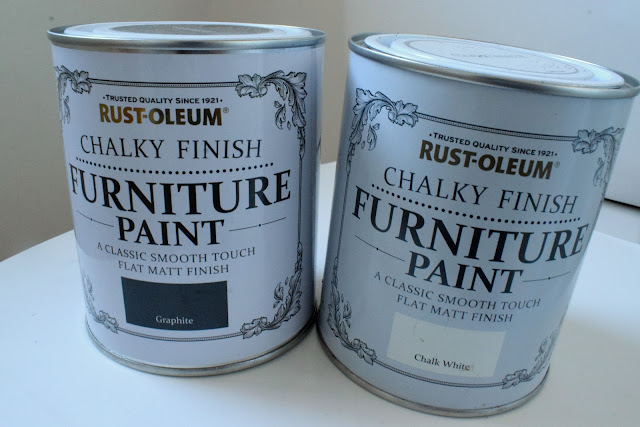
When I painted the kitchen floor I used primer and actual tile paint, doing two coats of each, and while it did do the job I definitely had to maintain it, touching it up every six weeks or so as little chips appeared in it. Plus the paint was stinky and expensive, so this time I decided to try a different method that I had seen on a lot of American blogs, namely, chalk paint covered by a protective finish, in my case matte water based varnish.


how to stencil a tile floor with chalk paint to get the look of Moroccan tile
similar grey paint - similar white paint


how to stencil a tile floor with chalk paint to get the look of Moroccan tile


I thoroughly cleaned the floor and let it dry first, then I cut in around the edges and along the grout lines with a brush before going over the whole floor with a small roller. And here's my first tip, chalk paint dries ridiculously fast, so if I were to do this again I would work in small sections rather than doing the whole floor at once, as I found I had to be very careful not to lift the paint from the areas I had cut in with the wet paint on the roller.


                        how to stencil a tile floor with chalk paint to get the look of Moroccan tile

                       how to stencil a tile floor with chalk paint to get the look of Moroccan tile

I did three coats of white to make sure everything was completely covered, and once that was dry I was ready to start stenciling!

Now, if you've been with me for any length of time you'll know that I don't have the patience for precision unless it's very easy to achieve, so I was more than half convinced that I was going to totally balls this whole thing up. I figured the best way would be to start in the middle and work out, so I eyeballed the centre, stuck it down with frog tape in the corners and got to work.

That's right, no measuring of any kind. It's either pure blind luck that I didn't end up with a total mess or this particular pattern is very forgiving.

how to stencil a tile floor with chalk paint to get the look of Moroccan tile
Similar stencil
                   
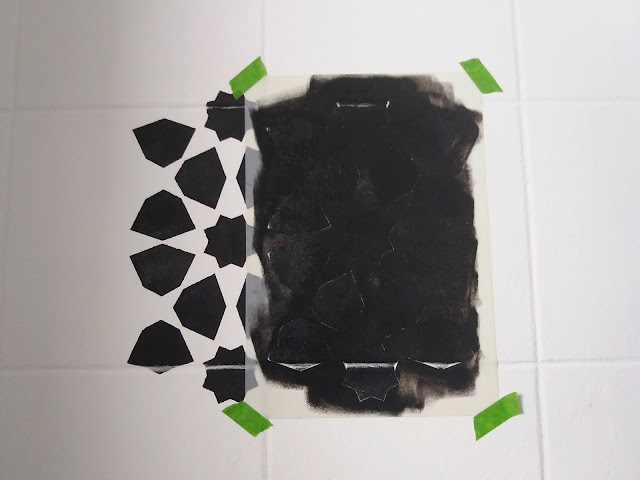
I loaded my roller with the darker paint and then rolled it on some newspaper to get rid of the excess in the hopes of minimising any bleeding underneath the stencil, then firmly rolled it over the stencil until all the shapes were completely filled in. Where the pattern went over a grout line I had to dab at it with a brush to fill it in.

As soon as I was done I lifted the stencil, moved it over until the pattern overlapped perfectly at the side, then stuck it down again and repeated the process. So what I mean is that after the very first one I did there was always a part of the pattern that was already filled in, because I was laying the stencil partially over my previous work. This is what gives you the continuous pattern and helps make sure everything is lined up properly. The paint dried so quickly that I never had a problem with smearing while I was doing this but I did occasionally wipe off the stencil to remove any excess paint that might have seeped under.

I realise that this "overlapping" is the crucial point of this project and probably what I should have taken a million photos of....I don't know what to tell you. I had a couple of hours of kid free time to listen to podcasts, drink coffee and paint and I guess the excitement got to me. So this is all I have......

how to stencil a tile floor with chalk paint to get the look of Moroccan tile


I'm sorry, I hope my shoddy description of the process is enough!


The main parts of the floor went quickly and were relatively painless, but when it got time to get right up to the edges things got a bit trickier. All I did was bend the stencil to get the pattern as close to the edges as I could and roll the paint as normal. I ended up with a small gap the whole way around but it just looks like a grout line. 
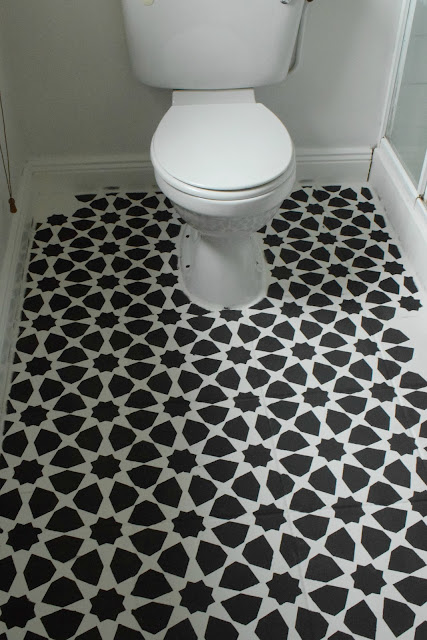
                 how to stencil a tile floor with chalk paint to get the look of Moroccan tile


                       how to stencil a tile floor with chalk paint to get the look of Moroccan tile


Once the whole floor was done I went back over it with an artists brush and the white paint and cleaned up the few places where paint had seeped under the stencil like below....

how to stencil a tile floor with chalk paint to get the look of Moroccan tile


Once everything was dry I went over it with three coats of water based matte varnish to protect it. I should point out that the whole time I was working on this I made sure to walk on it as little as possible and when I did need to I wore socks. Chalk paint is incredibly soft and easy to scratch. Like seriously. I managed to scratch the white layer with my bare feet!
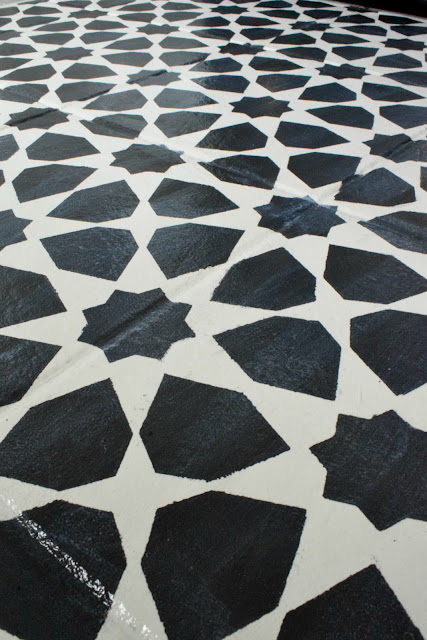

how to stencil a tile floor with chalk paint to get the look of Moroccan tile

Similar varnish
                         

The varnish goes on milky but dries clear, and while it does give a very slight sheen this was the matte version so it's not too shiny. Using water based varnish meant it was a much quicker process as each coat dried in an hour. Also it wasn't so stinky that it gave me a headache and it shouldn't yellow over time like oil based products do.

And so it was done!

I have high hopes for this lasting a long time without much upkeep. It already feels sturdier than the kitchen floor ever did, despite the fact that I used specialised products there and in here I'm winging it with products that definitely weren't meant to be used like this. Also it's extremely rare that anyone wears shoes up here, and it's only really cleaned every couple of weeks compared to the daily wear the kitchen got from brushes and mops.

I was honestly surprised at how relatively easy this was, and I'm absolutely delighted with the result. It's a total game changer, and now that I've seen it I can't imagine the space without it! 


What do you think? Have you ever stenciled anything? Will you be giving it a try now? I've put affiliate links to some of the products I used or similar below, and I'd love to see pictures if you end up trying it!


If you liked this post, you might want to check out:


                       how to stencil a tile floor with chalk paint to get the look of Moroccan tile

Friday 29 September 2017

turning an old dresser into a bathroom vanity


dresser to bathroom vanity


The en-suite has been plodding on at the speed of a stoned turtle with a gammy leg, but amazingly, finally, I actually have some progress to report! Actually, if I could just get my arse in gear and finish off the last few fiddly bits the bloody thing would actually be finished and I could move on with my life!

But anyway, I really wanted more storage in here. As I talked about in my original post about my plans for this space, the room is a decent size but an awkward shape and there isn't anywhere for free standing storage to fit.  I had originally planned to make Gavin build me a full length, slim cabinet with a mirror on it onto the one small section of clear wall we have, but it didn't happen. I think it just seemed like a lot of work and he wasn't confident about how he would do it,so he wasn't enthusiastic about it, and to be honest it wasn't worth giving up hours of precious free time trying to make something that might not even work.

Wednesday 20 September 2017

profane scrabble art


I love my kids, but good god they get in the way of DIY! Hopefully someday they will actually be able to help rather than hinder, but for now trying to do anything without them when they're awake is pretty much just pissing into the wind so things are moving at a glacial pace when it comes to actually finishing anything. It's fine. After three kids I know that time to do the things I want is not something that comes easy, or often, and to be honest I've realised that the time I do have is usually better spent looking after myself or spending time with my husband unless I really WANT to do some painting or whatever. It's a work in progress, but I'm getting better at suppressing my control freak tendencies and not letting the to-do list haunt me. 

Thursday 31 August 2017

updating to add value


This post is sponsored by Velux Windows


I love my house. After living in tiny apartments all my adult life my heavily pregnant self thought the four bedrooms and a garden this house offered was just about the height of luxury when we moved in. But as happy as I was with it then (and still am now!) it was never intended to be our forever house. I would love to be able to build our own house eventually, somewhere with a bit more privacy. As great as where we live is for the kids with all the other children around here I don't enjoy knowing my neighbours can probably hear me screeching like a lunatic every time we try to leave the house, and some day I'm going to totally lose my shit with the boys who constantly batter our pathetic fledgling hedge with their ball and then we'll HAVE to move. You know how it is.

Thursday 24 August 2017

so...how's it going?


becoming a stay at home mom update


It's been well over a year since I packed in my full-time job in order to be able to be home with the kids a lot more, and I thought it was time for an update.

Actually, a friend of mine recently said "you know people at my work regularly ask me how you're getting on, and I tell them you sell vibrators now", and that very random yet accurate description of my current situation made me think that maybe you guys would be interested in what's going on around here at the moment...and what vibrators have to do with it.

Tuesday 8 August 2017

She's here!


Yes, finally. After what seemed like the longest pregnancy in the history of the world Cora Olivia made her entrance at 7.02 on the 18th of July, five days early.

I don't know if any of you are as interested in birth stories as I am, but I'm going to share this one anyway so feel free to jump to the end if discussing dilation and stitches doesn't float your boat!


Tuesday 27 June 2017

pallet wood shelves


Way back when, somewhere in the mists of time, you may remember that I started making over our en-suite bathroom. Yes, that was almost a year ago and it is still far from finished. I blame the fact that no-one but us sees it so it's easier to forget. Embarrassment is a great motivator I find. But I had a short list of things I wanted to get finished before the baby arrives and getting this space finished was way up there.


Saturday 17 June 2017

fancy-fied plant pots


I feel a little bogged down lately guys. It seems like quite a bit is getting done around here diy-wise (di-yise?) but actually getting things finished, photographed on the odd day when there's decent light and I have the energy to clean up and then actually blogged about is a lot of hard work. And I'm like, large and slow at the moment. Plus, it seems like all I want to write about right now is the kids, or being pregnant, and while the odd post like that is probably interesting for you guys, it's not what most of you come here for right?

Friday 9 June 2017

I totally missed my second blog-iversary!


  Related image

Time flies when you're desperately trying to get through the day without collapsing in a sweaty heap on the floor and refusing to do anything else until someone removes the life sucking human you're gestating from you....and consequently I just realised that I totally missed my second blog-iversary!

This time last year I had had 60,000 visits to my little blog, and I was hugely proud of that. In the last year I have had 330,000!!!!!!! That's growth of like 550%* people!!!

*Please don't check my maths.

I hadn't actually realised things were going that well, and I'm so happy about it. On top of that I've recently been nominated for an Irish Beauty Blog Award (I know, weird, but it turns out they have a "design blog" category) and I ended up coming second in my category at the Blog Awards last September. It's really nice to get little pats on the back like that. Sometimes I wonder if I'm wasting time I should be spending elsewhere on this blog, but seeing things like that make me feel like I'm justified!

I'd totally keep doing it no matter what, but it's nice to feel like maybe I'm actually ok at this.

And wary as I am of seeming like I'm blowing my own trumpet here, I always love to know actual figures when it comes to blogs I follow, so I though some of you might be interested too. Plus, it's not like I make any money from this, so horn-tooting is all I have!

So what's the plan for the future of my little corner of the old interwebs? Well, I'm hoping that as soon as the little soul-sucker exits my body I'll get my mojo back and find myself able to do more of an evening than lie in a darkened room scarfing biscuits and binge watching Parks and Rec. There are many, many things that I could improve on here (starting with my blogging schedule!) if I just had a couple of hours a week to sit down and dedicate to it, and seeing as Em is starting school in September and Max will be in Montessori every morning then I'm hoping that the next year will be a LOT more productive than the last has been, blog-wise. Sure I'll have a newborn, but I've long since mastered the art of typing while breastfeeding, so I'm hoping it won't be a problem ;) 

So thank you guys for reading, and if you feel like saying hi leave a comment every now and again, I really do love hearing from you. Blogging can be weird and lonely, and it's hard to believe there's anyone paying attention sometimes.


Saturday 27 May 2017

I've been nominated! And it's weird!

Image result for beauty blog awards 2017 tickets


Ehm, so this is a bit weird but....I've been longlisted for the Irish Beauty Blog Awards?

Yeah, I don't know how that happened either. I'm lucky if I shower every second day and my idea of the perfect lipstick is one that hasn't been dropped down the toilet by my kids at some point, beauty blogger I am not!

I'm in the "Best Design Blog" category, which I don't even know if it refers to the actual design of my blog or the fact that I talk about design. But hey, it's really lovely to be included! Every time something like this happens it just makes me feel a little bit more justified in spending so much of my time dicking about on the internet! I'm quite proud of my little blog, and to get this kind of positive feedback is amazing.

So, if you'd like to vote for me that'd be awesome, and you can do so here.

And whoever nominated me, thanks. It's a bit weird, but I really appreciate it :)

Saturday 20 May 2017

plans for a super cheap garden makeover


Our garden is pretty crap. Yes, we're delighted to have it and it's a decent size, but our whole estate is built on a flood plain, and on top of that our soil is full of the usual builders detritus that seems to get dumped in the gardens of all estate houses, so our drainage is non-existent and the soil we do have is almost clay it's so wet and clumpy. 


So, it's not easy to have a pretty garden here. For most of the year our grass is completely waterlogged and even normal rain results in flooding at the bottom. So, I think in an effort to combat this and create some areas that were immune to this waterlogging, the previous owners put in slightly raised beds at the bottom and left hand side of the garden, and an area of concrete covered in gravel on the right.

We've stolen lots of plants from my MIL's garden and bought many more and the beds are finally starting to fill in a bit and there's a bit of colour out there now, but the gravel area is a problem. Sure, it looks nice and it's tidy, but practically it's pretty pointless. The problem is that the gravel is pretty deep, and while this is great for playing diggers, it's not so great for walking on. Also, and I'm only sharing this because I believe in showing you guys the reality and I feel like this is a safe place......the right hand side of our garden currently looks like this.....


*screams internally*

Yep, that's a giant pile of rubbish that not only hasn't been shifted since we got the kitchen tiles done but has actually grown as we clear stuff out of the house and throw them out there waiting to go to the recycling centre. You also have a large collection of plastic vehicles that Max likes to line up and wash here, various dead plants in pots plus some pallets I've been meaning to find a use for for over a year and a new fence panel that sticks out like a sore thumb. Pretty, isn't it?

So, what to do? It's been pretty much unused since we moved in nearly three years ago, and I suppose we were thinking that eventually we'd install some sort of paving or decking over it and make a usable seating area (and also somewhere where the kids could play outside when the grass was a swamp) but that's not going to happen this year. So we leave it until then I guess? But then, we actually had a week of beautiful weather recently, and as I sat at my tiny bistro set by the back door, perched on an uncomfortable chair trying to enjoy my coffee in the sunshine I thought "ENOUGH"! I have all this space available, why not just make it usable as cheaply as possible for now, and worry about doing a permanent job later?

So that's what I'm doing. I want a comfy seating area where we can all hang out in the unlikely event that we actually get a nice summer. I'm thinking pallets, cheap plastic furniture and fairy lights. Magical! The budget for this is non-existant so I'll be using things I have already and sourcing stuff from euro stores and second hand shops. I'm actually excited by the challenge! We'll be getting going clearing the rubbish this weekend, and I've already picked up a few bits and pieces to prettify the area, so watch this space!

And yes, I did try to get better pictures of everything out here, but I was foiled by a small naked entymologist who managed to get himself into nearly every photo asking me what I was doing and trying to show me the very interesting woodlice he had just captured. I don't know why he was naked, but it's not unusual around here.


If you enjoyed this post, you might also like:

Saturday 13 May 2017

removing and replacing a contact paper countertop

removing and replacing a contact paper self adhesive vinyl counter top


This post contains affiliate links

If you've been following my blog for a while you'll probably know that I covered my old kitchen counters in d-c fix contact paper about eighteen months ago. It's still by far one of my most popular posts and I constantly get questions about it's durability and whether I'm still happy with it, and the answer was always a resounding YES! Honestly, in the eighteen months it was in place it took a lot of abuse, I mean, as far as I was concerned it was an interim measure and I really did absolutely nothing to try and protect it. Water was spilled on it (and left to sit), hot things were placed on it, my "coffee station" which is basically a little tray on pointy legs was dragged across it repeatedly, and yet....nothing. It held up to everything I could throw at it with no lifting, scratching or bubbling. In fact, the only tiny piece of damage it showed was from when my husband dropped superglue on it and tried to scratch it off with a knife, and even that was minimal!


So, the time finally came to replace our kitchen tiles, and as the chipping off of the backsplash lifted the edges of the contact paper it was time to remove it. All along I had thought that this would be the perfect time to replace our counters as well, but when it came to it....well, I was totally happy with the contact paper, so why change it? I mean, a brand new shiny solid wood counter would be lovely, but was I willing to spend nearly a grand on it when I had such a fantastic alternative? No sir, no I was not.

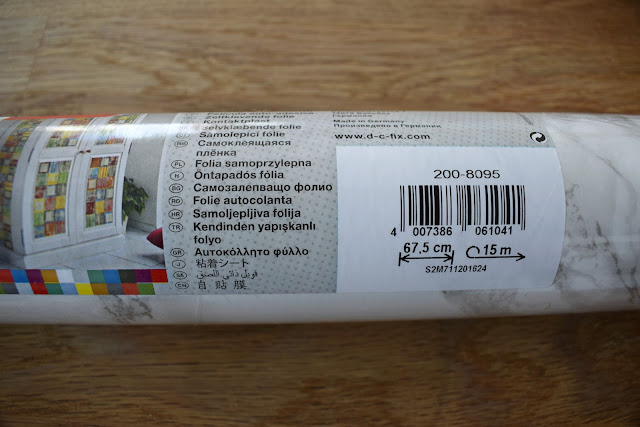
So I contacted the lovely people at d-c fix (they had gotten in touch last year offering to supply me with more paper if I ever had a suitable project) and I got them to send me a roll of their grey marble paper. I was absolutely delighted to discover that they do many patterns in a wider roll now, which meant I could cover my counters horizontally rather than vertically, meaning way less join points and consequently a much more seamless finish.
removing and replacing a contact paper self adhesive vinyl counter top
I'll leave an affiliate link for this product at the bottom of this post ;)


I had loved the more dramatic black vein through the paper I had previously, but I'm liking the more pared back feeling I've got in the kitchen now with the light grey floor and white subway tile backsplash, so I thought a lighter pattern would really compliment that. I definitely wanted to stick with the marble pattern, mostly because I love it, but also because I think the pattern really helps hide any joins in the paper and gives it that seamless look.

So first, we had the fun job of removing the old paper, and after all the questions I've gotten about whether it really doesn't do any damage I was eager to see just how this would go. I gathered my crack demolition team and set to work....


removing and replacing a contact paper self adhesive vinyl counter top


It was really stuck on there! But once you get it moving it came off easily. We didn't have to use any scrapers or tools and it took about twenty minutes to uncover the whole thing. The d-c fix website does suggest you blast it with a hairdryer to aid removal but I didn't feel like we needed to do that.


removing and replacing a contact paper self adhesive vinyl counter top


And just to clear up any "will it damage what's underneath" questions, may I present to you a photo of some paint splashes that I was too lazy to remove before I covered the counter. As you can see they are completely unharmed after removing the paper....and I was able to scrape these off with a knife in seconds afterwards! So honestly I couldn't see this stuff doing any damage to any surface. And there was absolutely zero adhesive left behind anywhere either. I don't know how this stuff sticks, but it didn't leave so much as a residue that needed to be wiped. 


removing and replacing a contact paper self adhesive vinyl counter top

removing and replacing a contact paper self adhesive vinyl counter top
Not a terrible counter by any means, but it still had to go!

The process of applying the new paper was exactly the same as before, and you can find the tutorial here. I cut the pieces to size, peeled back a small section of the backing at a time and started to stick the paper down, smoothing out bubbles as I went with a credit card. If you find any when you're finished you can poke a tiny hole in it with a pin and remove the air that way, but getting it right while you are doing it is really preferable. The paper can be lifted and re-done many times so don't worry if you get a lot of bubbles at any point, just peel the paper up past that point and lay it back down, being more careful to work the air out as you go.

I left a small edge where the paper met the wall/any edges, and went back over that with a craft knife at the end, trimming off the excess. As the roll was so wide this time, technically I could have done the whole thing in two pieces, and I did try, but I found it much too difficult to get a good finish around the cooker and sink this way, so I ended up using more than one piece for each counter, but I still ended up with a hell of a lot less in the way of joins than I did the last time I did this.

And that was that, two hours after I started I had brand new marble counters once more, and I'm loving them! I think the lighter colour really compliments the light grey in the floor now, and I' sure I'll be happy with them for the next two years at least!


removing and replacing a contact paper self adhesive vinyl counter top

removing and replacing a contact paper self adhesive vinyl counter top


If you liked this you might also like:


01