Thursday, 16 July 2015

if you go down to the wood's today......


diy birch tree painted mural feature wall nursery kids room


Max's room kind of naturally ended up being "woodland" themed. 

I had started out with an idea that I would do soft blues and oranges and bring in geometric shapes, but then everything I bought for it seemed to have foxes and owls on it. So when I made the curtains (tutorial soon) with an arrow print on them all of a sudden I had a "theme" without ever having consciously decided to do one! But it works, and the whole room has been one of those things that just came together really easily, without me having to think about it much (or at all!). 


So the room was pretty much done, but the wall behind the cot was completely blank. I had ordered blue and orange triangle decals when I thought I was going with a geometric feel, but now they just didn't work......

....ok, they probably would have worked just fine, but when I tried to put them up I realised it was going to be a NIGHTMARE to get them all even and lined up properly. I am both impatient and very bothered by things not lining up, so this was not going to work! I took them down again and kept them, I'm sure I'll find a use for them.


So I was left with a big blank wall....


diy birch tree painted mural feature wall nursery kids room
Add caption

I thought about hanging some art, but it would need to be big, and I was kind of worried about it falling and squashing the sprog.

(He took a lot of time and food to make and I'm quite fond of him)

Also, I already had art on the other three walls and I thought it would be too cluttered looking if I put more frames and stuff here. So I left it blank for a while and searched pinterest for inspiration, and eventually I came across these decals....

Birch tree wall decal for nursery and home by designedbeginnings, $85.00
Etsy
          
....but I didn't have €80 lying around that I wanted to spend on decals. Plus they were a bit too "cute" for what I wanted. The room was already a little on the babyish side for my taste what with the soft colors and the baby woodland animals everywhere, so I wanted something a bit more graphic and "real" looking to tone it down. I know it's a kids room, but I was going for "childlike", not full-on babyish.


And then, lo and behold,  I saw the idea for painting birch trees on canvas that I did a tutorial on last week , and i thought "holy crap! that's it!".

I tried it on the canvas, and it was unbelievably easy and effective, so one evening when Gavin was feeding the kids I grabbed a can of grey paint left over from our bedroom, a pencil and a plastic chopping board, and I headed upstairs to try it out.


diy birch tree painted mural feature wall nursery kids room
Any large piece of thin, rigid material would do I think, but chopping boards are easy to come by. The paint is a colortrend color called "clockhouse" that I had mixed in fleetwood paint cos it's cheaper.


And one hour later I had this.

 I am not exaggerating, this whole wall took one hour, including gathering my stuff together and sorting the bed out again so Max could go to sleep! This was one of those things that you know is going to work from the start, I love when that happens!


diy birch tree painted mural feature wall nursery kids room


I just drew a (really rough, freehand) outline of the trees on the wall in pencil and then used the same technique as I did on the canvas, dipping the chopping board in the paint, tapping off the excess and then placing it vertically against the outline on the wall and dragging it inwards.


diy birch tree painted mural feature wall nursery kids room
It's really hard to take photos with your "wrong" hand when you're also trying to rush to get the project done and not get paint all over your phone....just saying


diy birch tree painted mural feature wall nursery kids room


Behold! My wonky tree's!

 (proof they were free-hand)

 I think they have character ;)


diy birch tree painted mural feature wall nursery kids room


I got the little birdhouse's in Dealz for €1.49 each and painted them the same colour I used on the curtains. 


diy birch tree painted mural feature wall nursery kids room
That sign needs to be lower I think...funny how some things become obvious straight away when  you take a photo.

diy birch tree painted mural feature wall nursery kids room
The orange colour is "sweet orange" by valspar. A tester did these, the curtains and the lamp stand....they do really generous testers!


diy birch tree painted mural feature wall nursery kids room


I used an old loyalty card to do the smaller branches...same as I used for the canvas version.


diy birch tree painted mural feature wall nursery kids room


I think I'm just going to leave the middle blank. I originally thought I might put something there and that's why I left it, but now I like it as it is!


diy birch tree painted mural feature wall nursery kids room


So that's Max's room all but done. As soon as I get the last two tiny jobs done in here I'll do a post on the whole thing.

I really love it. It's soft and cosy and baby-friendly without being TOO babyish.


What do you think? Have you ever tried your hand at a mural or feature wall? I'd love to hear about it in the comments!


And just because no post about his room would be complete without a picture of the man himself....


'sup ladies?


Linda xx

10 things.....

10 things


Hey all! Just a quick little post today. I've been nominated to do a post on "10 things you didn't know about me" by aoifeweefa and it sounds like fun so here goes!


1. What's your party trick?

Does being really awkward and bad at small talk count?
It doesn't? 
Then I got nothing.

2. Cats or Dogs?

Cats, no contest. I already have two needy little animals following me around needing their poo cleaned up all day in the form of my kids, I don't need another one! Cat's only stay with you cos it suits them, I can respect that.

3. What is your most embarrassing moment?

I can't think of one, so either I feel no shame or there are so many that they've started to fade into one giant, awkward mass and feel normal....probably the latter I think!

4. If you could meet one person living or dead who would it be?

I've already met Daniel O' Donnell, (if you're not Irish that probably won't seem very impressive, trust me, it is!) who could top that?!

5. How long can you hold your breath for? (yes, you have to time yourself)

As long as it takes to change the monumentally horrific nappy of a robust, wriggly 8 month old who strongly objects to you doing so....so about a minute!

6. Why do you blog?

Because....it took a loooong time to get our house, and now that we have it I find it deeply satisfying to make it look like MY house...and there aren't many people I know who are interested in hearing about that as often as I would like to talk about it! Also, I read a lot of American diy blogs that I get inspiration from, but I get fed up of seeing great products etc that just aren't available here. So, when I started coming up with my own projects and figuring out how to make them work with what was available to me here in Ireland I thought there might be people out there who be interested in that....and so far it looks like I was right!

7. What’s your favourite TV programme?

Currently? Orange is the new black. 
Of all time? Buffy ;)

8. How many brothers & sisters do you have and are they older or younger?

One of each, both younger.

9. Do you live in a city or in the countryside?

On the very outskirts of the city. At some point in the future I'd like to move a bit further out but I don't know how practical that is given that I've gotten so used to being close to everything!

10. What was the last thing you bought other than food?

A set of three very fetching starburst mirrors for the living room from TK Maxx....most purchases are house related obviously, and I have a penchant for the gold/mid-century/totally useless items so I couldn't pass them up!


So there you go. I'm sure you're all soooo relieved that you finally know all that stuff about me now ;P Thanks for the nomination Aoife!

Back to normal posts tomorrow, I've done a feature wall in Max's room that I will hopefully get photographed today and have up asap. No promises though, we've already had several meltdowns here today (mostly by the children) and that trend looks set to continue so I might just start drinking early and leave the photography for another day ;p


Linda xx

Tuesday, 7 July 2015

easy diy birch forest painting


diy birch tree forest painting
#


This isn't an original idea or anything, but it turned out so well and took so little time and effort that I thought it was worth sharing!

I'm always on the lookout for cheap and easy ways to create great artwork. I change my mind about what I want to display so often that if I didn't create a lot of it myself I'd be broke! Or more broke to be accurate ;) So when I saw this idea on pinterest (I was actually looking for mural ideas for the wall in Max's "woodland" room) I knew I had to give it a try, and in a spare half hour while Max was napping last week Em and I broke out our art supplies and did just that.

You'll need all the usual stuff, plus an old membership card to make the "birch bark" effect. I used acrylic paint for the background and a sample pot of regular wall paint for the bark, cos it was the right color and I had it to hand. ~I've often used house paint in art projects, there's no reason not to unless you're looking for some sort of chunky effect that you'll only get with acrylics or oils.

I just used cheapo masking tape cos I wasn't too fussed about clean lines and I didn't want to waste my frog tape, that stuff isn't cheap!


diy birch tree forest painting


I taped off the "trees" with two pieces of tape each.


diy birch tree forest painting


Then I painted in between the trees to make a background.


diy birch tree forest painting


I wasn't feeling my first attempt to I went back over the pink with grey and white.


diy birch tree forest painting


Emilia tried to "help", hence the blue marks....they were on taped parts though so no harm done. I removed the tape before the paint dried, leaving me with clean, white "trees".


diy birch tree forest painting


Then came the fun bit! I dipped the card in the dark paint, tried it out a few times on a piece of paper to get a feel for it (and discovered less is more!) and then just went along the edges of the trees, dragging paint across.


diy birch tree forest painting


Just don't put too much paint on the card, you can always add more and go back over it if you need to.


diy birch tree forest painting


It was really quick and easy, I did the whole thing in about twenty minutes.


diy birch tree forest painting


diy birch tree forest painting


I added the little gold heart with our initials, cos I'm sentimental like that. (cue uncontrollable laughter from anyone who knows me). Really, I just thought it needed something extra. It would look better done in gold leaf but I didn't have any so I just used gold acrylic paint and it didn't turn out too badly.


diy birch tree forest painting


So there you have it. I really like it, it was so easy to do and I think it's really striking. It might even be better with a plain white background, I'll try that next! And I'm definitely going to try the technique on a bigger scale on the wall in Max's room, sooner rather than later. Watch this space!


diy birch tree forest painting


What do you think? Would you give something like this a try?

Linda xx

Wednesday, 1 July 2015

Awesome apothecary jars....and what to do with them.


Apothecary jar decor, ideas for what to fill them with


Apothecary jars.

Is there another name for these that isn't quite so pompous? Anyway, you know what I mean, the big glass jars with lids that have been doing the rounds on pinterest for the last few years now.


I'd wanted some for a long time, and then I found one for €18 in a second hand shop, and i was delighted, cos the only other place I'd seen them had been on Amazon, for €30-€40 each.

But I didn't want just one, I wanted a display, and that meant three. Don't ask me why, that's just what my brain told me.

So I kept an eye out, and then, on a rare trip to TK Maxx, lo and behold, there they were! A whole display of them, in different shapes and sizes, all for under €10 each! So I snapped these two beauties up and swiftly left the shop, cackling to myself.


So now I have three, and they've been in several positions around the house already. Currently they hold fruit, and I love how that looks, but there are so many different things you could display in them that would look fantastic, and I will definitely be trying a few of these ideas in the future.....


Sweets

Probably the most obvious choice but very effective, and you can get them in every color known to man so you could definitely get the look you wanted with them. A good tip I saw was to stick a tube of cardboard in the middle of the jar and then just fill around the outside of that so you don't have to buy about a bajillion sweets.


Apothecary jar decor, ideas for what to fill them with


Flowers

Another fairly obvious choice, but still a good one, and again, you'll find flowers to suit whatever look you're going for.


Apothecary jar decor, ideas for what to fill them with
Everything Fabulous


If you want flowers, but still want a bit of variety, how about a water lily?


water lily terrarium
Etsy


Or a succulent?


Growing Succulents in Apothercary Jars - Chic Coastal Style. Perfect for brown thumbs!
Sand and Sisal


Bath Products

How about using them to store bathroom products like sponges, bath bombs and salts? Give your bathroom that luxurious spa feel!


Glass containers to hold soaps, salts, bath essentials.
Pottery Barn


Anything Goes

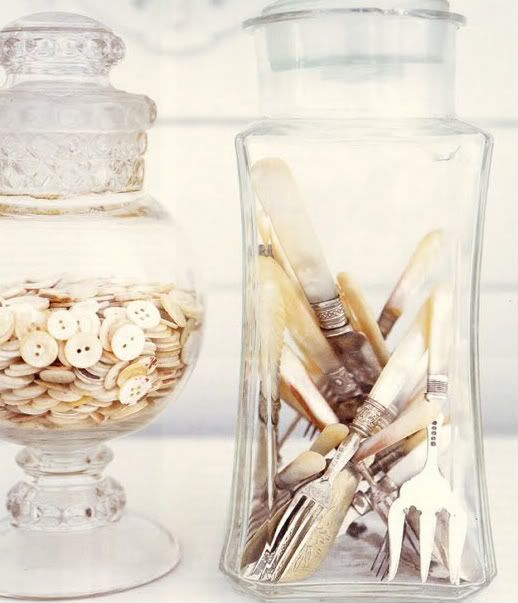
This is one of my favorite ideas, displaying your interesting objects or collections. Just make sure you get enough height by creating a stacked effect if the object isn't big enough to fill a large portion of the jar by itself.


800be5c4b3daedcd60661235907cdc4b
Miss Mustard Seed


Add caption


Christmas!

I love Christmas, and I love Christmas decorating, so I can't wait to try out some of these ideas. I especially love the white lights in the fake snow, I have sets of L.E.D's that will be perfect for this.


Pink Pistachio


Table-Escape-Christmas1
The 36th Avenue


And lastly......


Nothing

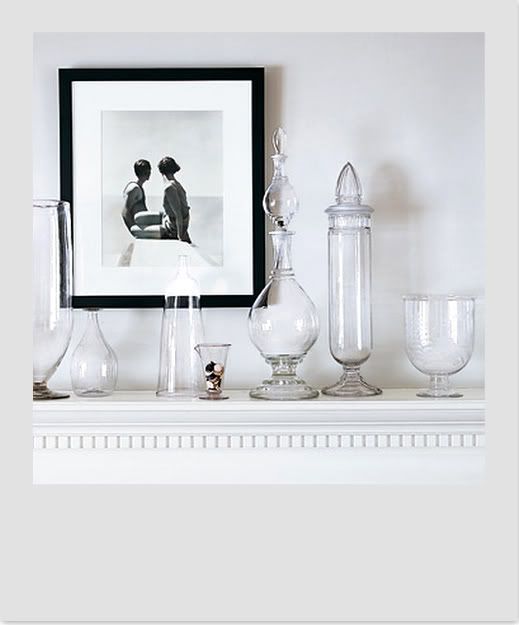
Ever heard the saying "don't over-gild the lily"? Well, apothecary jars are pretty fantastic looking by themselves, so I reckon they look pretty great as is. Just remember the basic rule that you should group them in odd numbers, and vary their heights, and they'll look great!


What would you display in these bad boys? Let me know in the comments! Also, I've just found a load of tutorials on pinterest about how to make your own (yes, I know, how would you do that? But apparently it can be done, it's a thing!) so I'm pretty sure I'll be trying that out as soon as I gather the materials. I'll let you know how it goes ;)


Linda xx


01