
Keep your eyes peeled people, the playroom reveal is coming this week! I've decided that I'm never going to do the couple of things I've been meaning to "finish off" in there so this is a good as it gets. I'm just waiting for the gods of good photo's to bless me with a bright day that happens to coincide with the room being tidy and I'm golden!
So basically don't hold your breath.
In the meantime I wanted to share this nifty little idea with you fine people.
I had a blank space on the wall in the playroom that I didn't know what to do with. I already had a LOT going on here what with the mural, and the polka dots, and the gallery wall.
More is more people. MORE IS MORE!!!!!!
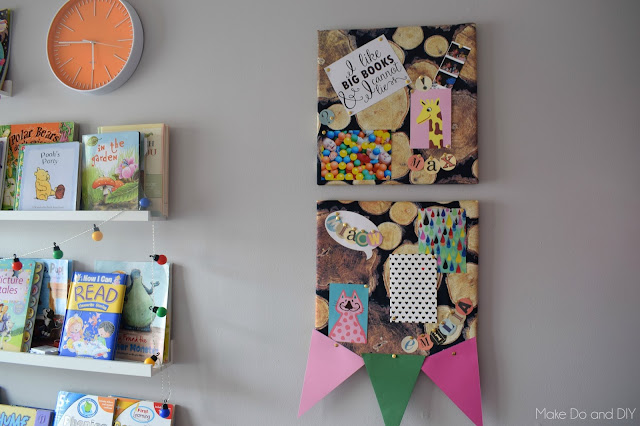
So not wanting to overdo it, and definitely not wanting to spend any money on it, I dug out the two cork boards that had been in here for pinning up the kids art before the makeover. I got them in Tesco for €5 each and they were really useful, so I decided to jazz them up a bit and stick them up in the space. You can never have too much display area in a playroom right?

This is particularly good if you have used a fabric elsewhere in a room, and want to bring it in somewhere else. I had covered the kids chairs in this amazing fabric from Ikea, and as I had some left I decided to staple it over the cork boards.

This ain't rocket surgery, start in the middle of each side, pull 'er tight and staple!

So that's it, a quick little project that you could have done in half an hour. If you're like me you have lots of odds and ends of fabric lying around waiting to be used, or you want to bring a particular pattern into a room and could use these as "canvases" to do that. I love them, and they finished off the room so I'm happy!

I left a little space to stick command strips on to make them easy to put up on the wall.

I think they look really great just as "art"....

...and equally cute showing off all the odd little bits and pieces I couldn't find a place for elsewhere :)
Note ~ this is too high up for Max to reach, but I don't trust the little bugger not to build a scissor lift out of lego or something so the lower down board will have the pins removed and replaced with glue dots.
 |
| Only trust those who like big books, they cannot lie. |
So that's it, a quick little project that you could have done in half an hour. If you're like me you have lots of odds and ends of fabric lying around waiting to be used, or you want to bring a particular pattern into a room and could use these as "canvases" to do that. I love them, and they finished off the room so I'm happy!
See you all again at the end of the week when I finally share all the pretty pictures of the finished room....although you've already seen most of it by now! :)

If you liked this post, you might also like:


